
Wedding dress adjustments are the quiet, behind-the-scenes work that make a gown feel like it was made for you, not just bought in your size. The problem is that brides often plan for “a quick hem” and overlook the significant changes that happen once a dress is on a moving body, with shoes, underwear, jewellery, and a full day of sitting and dancing. Get the key alterations right and you stop thinking about the dress entirely-which is exactly the point.
Most fit issues aren’t dramatic in the mirror; they show up in photos, during hugs, or halfway through the reception when you realise you can’t lift your arms. A good seamstress spots these early, but only if you ask for the checks people commonly skip.
Why the “small” tweaks matter more than the big ones
Many brides focus on obvious sizing-taking in the waist, letting out the hips-and miss the comfort mechanics. Strap length, bodice grip, bustle placement and neckline stability decide whether the dress stays put or needs constant tugging.
The goal isn’t just a flattering fit; it’s a dress that behaves for twelve hours.
These adjustments are also easier to do early. Leave them late and you can end up choosing between comfort and keeping the original design intact.
The most underestimated wedding dress alterations
1) Strap and shoulder reshaping (even on “strapless” styles)
Straps are rarely just straps. They control the bodice angle, the neckline height, and how the weight of the skirt is carried. Even a strapless dress has internal structure that acts like a strap system-if it’s a touch too long or too loose, the whole dress slides.
Ask your fitter to check: - Whether the bodice stays up when you lift both arms - Whether the neckline gapes when you lean forward - Whether the dress pulls down after a few steps
A half-centimetre on the shoulder can change everything, and it’s far less invasive than rebuilding the bodice later.
2) Bust cups and bodice “grip” (not just adding padding)
Many brides add cups and assume that’s support. Proper support is about anchoring: the bodice needs to hold you in place, not just fill space. If you’re constantly adjusting, the issue is usually the top edge, side seams, or the internal boning-not your bra choice.
Practical options your seamstress may suggest: - Sewing in cups that match your shape (not a standard pair) - Adding or reshaping boning channels for stability - Creating a discreet waist stay (an internal belt) to stop downward creep
These are small on paper, but they’re the difference between relaxed posture and “bride shimmy” all day.
3) Neckline and armhole comfort shaping
Armholes that look fine standing still can rub, pinch, or limit movement once you’re hugging people and raising a glass. Lace edges can also scratch when the fit is slightly off and the fabric shifts.
A fitting should include movement checks: - Reach forward as if hugging - Lift your arms as if dancing - Sit down as if eating
If anything bites, it usually needs reshaping at the armhole curve or a tiny lift at the shoulder-not a full redesign.
4) Hem height and front “float” with your actual shoes
A hem is not one number all the way around. The front needs enough clearance to walk without kicking the skirt; the back needs to skim without dragging like a mop. Brides often bring shoes, but forget that they’ll swap into lower heels later-or they choose a chunky sole that changes the way the dress falls.
Bring to the fitting: - Your ceremony shoes - Your likely evening shoes (if different) - The underwear or shapewear you’ll wear on the day
If you plan a shoe change, ask for a hem that works for both, or you’ll spend the reception lifting your skirt.
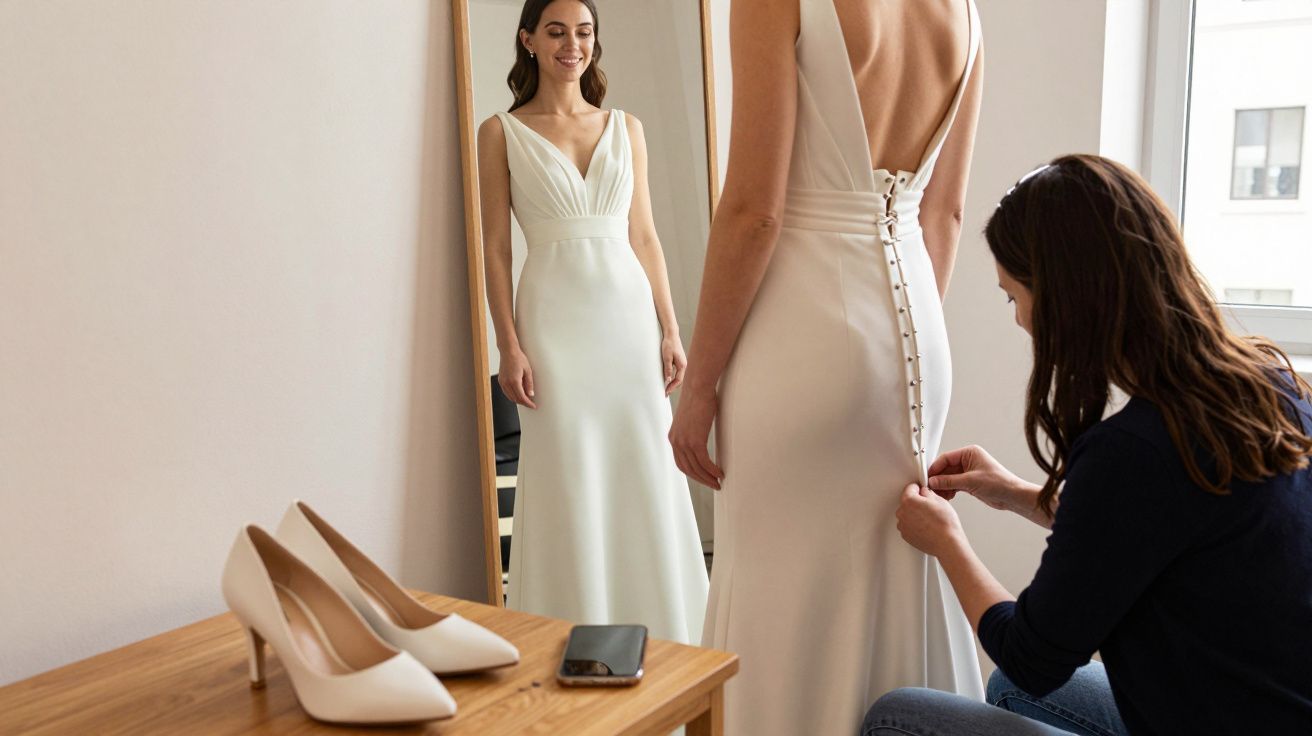
5) Bustle placement you can actually manage
Bustles look simple until you’re trying to hook them after a glass of fizz, in low light, with a friend who’s never seen your dress. Underestimating the bustle leads to tripping, torn loops, or a “wonky” drape in photos.
Make this part non-negotiable: - Practise bustling at the fitting (record a quick video) - Assign one person who’ll do it on the day - Ask for colour-coded ties or reinforced loops if the skirt is heavy
A bustle that’s secure but complicated is still a bad bustle.
6) Train and skirt weight distribution
Heavy skirts pull from the waist and can make the bodice slide, especially on fitted styles. Brides often interpret this as “the bodice is too big” when the real fix is distributing weight internally.
Common solutions include: - A waist stay to transfer weight to your waist instead of your neckline - Extra hooks or hidden supports inside the skirt layers - Adjusting how the skirt is attached at the waist seam
This is subtle tailoring that keeps the design intact while making the dress feel lighter.
A quick checklist for your fittings
The simplest way to avoid last-minute panic is to treat fittings like a wear-test, not a photo moment.
- Walk up and down a corridor in the dress
- Sit, stand, and twist at the waist
- Raise your arms and take a deep breath
- Ask where the dress is “anchored” (waist stay, boning, structure)
- Confirm who is bustling the train and how long it takes
If your seamstress doesn’t prompt these checks, you can-and should.
When “significant changes” are worth it (and when they’re not)
It’s tempting to chase a perfect vision, but some major alterations cost more than people expect and can change how a dress hangs. Rebuilding a neckline, converting a back, or resizing multiple layers of lace can be done, but it’s rarely quick.
Use this rule of thumb: - If the change improves comfort and wearability, it usually pays off. - If the change is purely aesthetic and fights the dress’s original structure, try accessories first (straps, bolero, belt, overskirt).
A good atelier will tell you what’s achievable without compromising the gown. Listen to that honesty-it saves money and heartbreak.
Timeline: how to avoid rushed decisions
Alterations aren’t just sewing; they’re planning. Your body can change, fabric can settle, and each adjustment affects the next one.
A sensible approach for most brides: - Start alterations around 8–12 weeks before the wedding (earlier for complex gowns) - Book 2–3 fittings - Leave at least 1–2 weeks buffer for final tweaks
Last-minute changes are possible, but they’re rarely the calm option.
FAQ:
- Can I do alterations without my wedding shoes? You can start bodice work, but hemming and bustle placement are best done with your shoes (or at least the correct heel height) to avoid a skirt that drags or kicks up at the front.
- What if I’m trying to lose weight before the wedding? Tell your seamstress early. They can sequence fittings so major bodice work happens closer to the day, while structural comfort fixes (like waist stays) are planned from the start.
- Do I need a bustle if my dress has a small train? If there’s any length you could step on, a simple bustle or wrist loop is usually worth it-especially for dancing and crowded venues.


Comments (0)
No comments yet. Be the first to comment!
Leave a Comment